Pages

Rapunzel's Braid


Wow!  I really didn't mean to be gone so long...well, actually, I hadn't meant to be gone at all...but being a mom and a business owner, sometimes things come up.  I got busy trying to finish up the projects I needed to show off 3 of the tables for the Princess Fundraiser.  The young women wanted to see a preview, so I did nothing but craft and create for a few days.

They turned out SUPER cute and both the girls and I are excited about the direction of the table decorations.  I previewed Snow White, Rapunzel, and Beauty and the Beast tables for them, so of course I had to make Rapunzel's braid.

Now in theory, it wasn't that hard to make...in theory, but I can see now why they charge so much for them on Etsy.  They are ALOT of work to make!

I started by tying one end of a skein of yarn to my vacuum handle.

Then I walked all the way across the room (it was about 20 feet) to the banister and wrapped the yarn around and back to to the vacuum.  I did this 10 times and then I cut both ends so I had 20 strands of yarn.  Then I did it again, so I ended up with 40 strands.

Here's where it got tricky...

I used a rubber band to secure the strands together and divided up the yarn into 3 sections of 15 strands each.

I tried to braid it myself thinking it wouldn't be too difficult...DON'T DO THAT!
It IS too difficult.  I ended up getting the string all tangled and in a knot.

So I had to wait until the hubby and kids got home.  Then he held the end of the yarn and made sure it was tight as we weaved and braided.

Then Drama Queen, Daredevil, and I each grabbed a section of yarn.  Daredevil wrapped the yarn around his body by spinning in a circle so it wasn't too long and getting tangled as he worked.  Drama Queen and I wrapped ours around books and just unraveled as needed.

I wish I had a video of the next part as it was rather interesting to watch...or at least Mini Me thought so!  He sat and laughed at us as we bobbed and weaved. 

It did take us a bit to figure out our pattern but eventually we got it down so we were doing a May Pole dance around the room braiding the yarn.

We ended up with a LONG ribbon of yellow "hair" which I am wrapping around the table and weaving between the other directions. 

I do LOVE how it turned out and I wouldn't be afraid to make another one, so if you're thinking about it...go for it.  It takes a little bit of coordination and ALOT of help, but it's kind of fun and makes a great decoration for a Rapunzel Birthday party!
reade more... Résuméabuiyad

April Foodie Penpal Reveal Day

The Lean Green Bean

Here it is the last day of April already, and time to reveal what I received in my Foodie Penpal package this month.  This exchange is hosted by Lindsay at the Lean Green Bean.  This month she even alphabetized all the names.  What a job that must have been.  There are now over 600 with exchanges in Canada and the UK.  Thanks Lindsay for all your hard work for us.

My package came from Lizzie at The Weekday Vegan.  It is always like Christmas to me when I unpack my box.  These are the wonderful and delicious things I found.

IMG_2795-1

First there was a can of  Butter Toffee Peanuts.  I love these but rarely buy them, so these were a real treat.  Oh how I enjoyed them.

IMG_2797-1

This little mix sounds so good, but we are not beer drinkers, and I keep forgetting to buy beer so I can make this up.  I do love small batch mixes from specialty mills like this.

IMG_2800-1

This one I did get made up.  Love scones and jam.  Wonderful, wonderful.

IMG_2805-1

I had to giggle when I saw the package of tea.  I sent tea to my penpal, too, not the same brand or flavor, however.  I drink tea a lot but had never tried this one.  Very good.  Notice the personalized note card with Lizzie’s name on it.  How cute.

Thanks, Lizzie, for sending such a great package.  You picked very well for me.

My package went to Rachel at My Naturally Frugal Family.  Hop on over to her blog to see what I sent.

If you have been missing all the fun and want to join in.  Here is all the info straight from Lindsay.

-On the 5th of every month, you will receive your penpal pairing via email. It will be your responsibility to contact your penpal and get their mailing address and any other information you might need like allergies or dietary restrictions.
-You will have until the 15th of the month to put your box of goodies in the mail. On the last day of the month, you will post about the goodies you received from your penpal!
-The boxes are to be filled with fun foodie things, local food items or even homemade treats! The spending limit is $15. The box must also include something written. This can be anything from a note explaining what’s in the box, to a fun recipe…use your imagination!
-You are responsible for figuring out the best way to ship your items depending on their size and how fragile they are. (Don’t forget about flat rate boxes!)
-Foodie Penpals is open to blog readers as well as bloggers. If you’re a reader and you get paired with a blogger, you are to write a short guest post for your penpal to post on their blog about what you received. If two readers are paired together, neither needs to worry about writing a post for that month.
-Foodie Penpals is open to US & Canadian residents. Please note, Canadian Residents will be paired with other Canadians only. We've determined things might get too slow and backed up if we're trying to send foods through customs across the border from US to Canada and vice versa.
If you’re interested in participating for May, please CLICK HERE to fill out the participation form and read the terms and conditions.
You must submit your information by May 4th as pairings will be emailed on May 5th!
*If you're from somewhere besides the US, Canada or Europe and want to participate, send me an email and I'll see if we get enough interest this month!

I am linking to Foodie Penpal Reveal Day
reade more... Résuméabuiyad

Streusel Banana Nut Bars

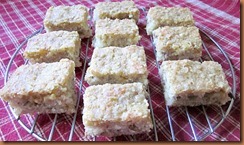
I liked the streusel topping that I used in the P B and J Streusel Bars that I posted last week so much, that I decided to use it with another bar cookie.  Since bananas were the Ingredient Spotlight over at Eat at Home this week, I also had bananas on my mind.  I decided to top a favorite banana bar recipe with the streusel topping.  I am glad to say that this worked very well.  The topping added a nice crunchy contrast to the smoothness of the bars.

The banana bar recipe has been in my files forever, and I don’t know where I got it.  It is very good and makes a large amount.  I have used walnuts, pecans and almonds in these, generally using whatever nut I had on hand.

IMG_2814-1

Streusel Banana Nut Bars
1 c. sugar
1 c. vegetable oil
1 c. mashed very ripe banana (2 to 3 medium)
4 eggs, beaten
1 t. vanilla
2 c. flour
1 t. salt
1 1/2 t. baking powder
1/2 c. chopped toasted nuts
1/2 c. brown sugar
1/2 c. flour
1/2 c. quick-cooking rolled oats
1 c. butter, chilled

In a large mixing bowl combine sugar and vegetable oil.  Mix well.  Add mashed bananas and beat until smooth.  Add eggs and vanilla and beat well.  Combine flour, salt and baking powder.  Add to banana mixture and mix until smooth.  Stir in chopped nuts.  Pour into a greased and floured 10x15-inch baking pan.  In a medium bowl, combine brown sugar, flour and oats.  Cut in butter until particles are the size of small peas.   Sprinkle mixture evenly over batter.  Bake at 350 degrees for 25 to 30 minutes.  Cool.  Cut into bars and enjoy.  Makes about 45 bars.


reade more... Résuméabuiyad

Friday Finds

Last week I shared links for one of my favorite spring foods-asparagus.  My favorite spring fruit is, of course, strawberries.  I love them served simply with a little sugar and cream, and I love them fancied up as part of a dessert recipe.  Here are some luscious sounding strawberry recipes I found this week.

Weelicious

This is a recipe that uses just strawberries, lemon juice, and agave nectar or honey.  This should make this a very "strawberry" tasting preserve.  I am very anxious to give these a try.  This is a small batch recipe so that you can used up the preserves before they spoil.  I would love these on pancakes or waffles.

Kalyn's Kitchen

This is a simple dish with a fancy name.  Strawberries, sour cream and brown sugar or Brown Sugar Splenda.  Use no or low-fat sour cream, and you have a low cal dessert.

You all know that I like bar cookies.  Here are two that combine strawberries with either lemon or rhubarb, both things that go well with the berries.

Nook and Pantry

White on Rice Couple

Strawberries are great in muffins.  Here are two new recipes I want to try very soon.

Jane's Sweets & Baking Journal

Two Peas and Their Pod

My very favorite spring dessert made with strawberries is fresh strawberry pie.  I loved the fresh strawberry pie that I used to be able to get at Bob's Big Boy restaurant.  Here is a simple one that could be made with Splenda.

Thrice The Spice

Perhaps one of these will go on your menu the next time that you buy strawberries.

Several of the blogs listed today are "new to me" ones, and I will be going back to check them out soon.

As always the photos were taken by and are the property of the owners of the respective blogs represented.

I am linking up with Friday Favorite Finds at Finding Joy in My Kitchen.  Hop on over  to see what other bloggers have found in their travels around the web this week.


reade more... Résuméabuiyad

Ingredient Spotlight-Peanut Butter Banana Oatmeal

Happy Wednesday  and welcome to my new followers.  I see I have 99 today.  I feel a little give-away coming on when I reach 100.  Thanks to all who take the time out of their busy lives to read this blog.  I know that posting has been a little erratic lately, and I appreciate you stopping by.

Today's Ingredient Spotlight over at Eat at Home is bananas.  A banana is a wonderful, versatile fruit that comes in its own carrying case.  Such a wonder of nature.  For me personally a banana should be barely yellow.  I do not care to eat them after they have many brown spots.  I do love to put the riper ones in cookies, breads, and cakes, however.

Today I am sharing a recipe that is a nice change-up for regular breakfast oatmeal.  If you like peanut butter and bananas, this should be "right down your alley."  This is almost not a real recipe, and I found the idea at Taste of Home.  I like the crunch of the peanuts contrasted with the smoothness of the oatmeal and bananas in this, so use extra-crunchy peanut butter.  Of course, creamy peanut butter can be used instead.  All water or all milk can be used instead of the combination.  I use the combination and usually end up adding just a little milk when I eat the oatmeal.  I find that the less milk I need to add when serving, the hotter the oatmeal stays while I eat it.


Peanut Butter Banana Oatmeal
adapted from Taste of Home

1 1/2 c. water
1 1/2 c. milk
1/4 t. salt
1 1/2 c. quick-cooking rolled oats
1/2 t. vanilla
2 T. peanut butter, crunchy or creamy
4 t. sugar or to taste
2 fairly firm bananas, sliced

Combine water, milk and salt in a medium saucepan.  Bring to a boil.  Stir in oatmeal and cook 1 to 2 minutes or until desired consistency.  Remove from heat and stir in vanilla and peanut butter until well blended.  Add sugar to taste and mix well.  Pour into four serving bowls and top each serving with slices from half a banana.  Makes 4 servings.

Linking up to:  Ingredient Spotlight


reade more... Résuméabuiyad

Tangled in Etsy

reade more... Résuméabuiyad

Beauty and the Beast Table Centerpiece

Our fundraiser is still a month away, but I wanted to start setting up the tables as I completed them to try and get a heads up on how they are going to look.  I'm glad I did.  I found a few holes in my Beauty and the Beast table and will now have time to add a little more to it before the big night.

I started with a  round yellow tablecloth that I purchased online from Factory Direct Party.  (I highly recommend them for table cloths.  They had a HUGE selection and I got mine VERY quickly and at a GREAT price!)  I envisioned the table cloth looking like Belle's dress.  So I purchased a round yellow cloth and a long cloth.  I cut up the long tablecloth into strips and used it to make the loops around the table.  Then I fastened each loop with a yellow tissue paper rose.

In the center of the table I placed 3 young adult books from our collection to celebrate Belle's love of reading.  On top of the books I placed the Beast's Rose as the main centerpiece.  I scattered rose petals inside the jar and then down the books.

The characters Chip, Cogsworth, and Babette went around the outside of the books.  I am hoping to get enough toilet paper rolls this week to finish Lumiere.  I also decided I HAD to find Mrs. Potts so I spent today looking at all the Goodwill stores in a 100 mile radius for a tea pot that would work.  I think I found one, but she's going to take a lot of paint and some facial features like Chip's.

I'm working on a few other additions for a Beauty and the Beast party such as princess seeds, cupcake toppers and these table cards with each of the characters on them.  They should be available soon.
reade more... Résuméabuiyad

Friday Finds


Yesterday I noticed that the local produce stand has their asparagus sign out.  This is a sure sign of spring.  We are fortunate enough to live in an asparagus-producing area so can purchase it fresh at a very reasonable price all season long.  I will be stopping by to make my first purchase today on the way to work.

Asparagus is one of my hubby's favorite veggies, and we eat a lot of it in season.  There is only one way that he wants it prepared, however, and that is breaded and deep fried.  Me, I love asparagus anyway you want to put it in front of me.  Here are some ideas I found that will. maybe, get hubby out of the deep-fried asparagus rut.

Finding Joy in My Kitchen

From our own "Friday Favorite Finds" leader comes one of the simplest, and, I think, one of the best ways to prepare asparagus.  Sno White used basil in her recipe, but this could be varied with other herbs.

The Better Baker

This recipe from Marsha is one I am very anxious to try, even if I end up eating it all myself.  The additional of brown sugar is interesting.  Of course, I think sugar makes most everything better.

Kalyn's Kitchen

I think that this idea would make the perfect spring-time luncheon main dish or maybe just a hearty snack.  She does say that a bit thicker asparagus spears are best for this dish.

Mennonite Girls Can Cook

Here is a casserole with ingredients much like that green bean casserole except using asparagus.  This would be a good one if you wanted to "gussie up" some asparagus for a potluck or such.  What I like about this dish is that chicken or ham could be added, and this would be a great main dish.

Asparagus is a great ingredient to use in soup.  Here are a couple of ideas.

Simply Recipes

Asparagus paired with chicken broth and cream.  Sounds yummy to me.

The Better Baker

Back to Marsha for this one, and she pairs asparagus with Monterey Jack cheese.  This is a combination that I would not have though of.

So, I am curious.  Asparagus seems to be one of those veggies that people either love or hate.  Do you like asparagus, and how do you prefer it prepared?

As always the photos were taken by and are the property of the owners of the respective blogs represented.

I am linking up to Friday Favorite Finds at Finding Joy in My Kitchen.  Click on over to find links to what other bloggers have found in their travels around the web this week.


reade more... Résuméabuiyad

Babette the Feather Duster


If all goes well, I should be able to show you a preview of the Beauty and the Beast table for our fundraiser tomorrow.  It's been a crazy week, so I'm hoping things will work out enough that I can get the last finishing touches on my table done in time.

I'm continuing with the Characters for the table and had to make Babette the Feather duster today.  I knew from the moment I started thinking about making characters, exactly how I was going to make her, and I think she turned out pretty cool in the end.


I started with 24 sheets of 10x10 inch tissue paper.  12 sheets where white and 12 were black.

Then I folded it into an accordion pattern.

When it was done, I wrapped a rubber band around the center.  (You can use a piece of wire if you want, but I was using what I had on hand.)

Starting on the white side, since Babette has white on the bottom of her duster, I folded the paper up one side at a time. 

 Then I would switch in a clockwise pattern and do the other side.


I did all the colors and ended up with a HUGE puff of tissue paper.

When I flipped it over, I had the perfect base for Babette's duster.

(Again, I used what I had on hand.) I took a paper clip and straightened it out into a "U" shape.  Then I strung it through the rubber band so it was standing up straight.

I printed out the Babette printable (at the bottom of this page) and cut it out.

I glued the printable at the top of her head and then the rest of her body around the paperclip so she was standing up straight.

And now Babette has joined the gang.


reade more... Résuméabuiyad