Pages

Witch's Cupboard Halloween Dessert Table


It's finally "almost" Halloween.  My kid's have been counting down the days for a month now and we've been baking, crafting, and haunting up a storm for our Halloween party.  Now it's time to PARTY!


We decided to go with a Witch's cupboard this year for our dessert table.  Everything we have to eat would be something you might find in a witch's brew.  So in the center of our table, we had to have a bubbling witch's cauldron.  I can't tell you enough how much I LOVE, LOVE, LOVE how this looks in person.

We found a big cauldron at Goodwill and drilled a hold in the back upper rim.  Then we filled it with a brick and some water.  The brick was to put this awesome Fog Mister from Oriental Trading Company on so it would release fog, color, and bubbles onto the table.  It is super cool.

I made this great cupcake tower out of candlesticks painted black and garden pot bases.  I intended to put my Witch Cupcakes on there, but ended up being the perfect fit for my Halloween pumpkin treats, Monster boxes, and Skull Caramel Apples.

This awesome test tube feature was found at Goodwill too.  I'm not sure what it originally was, but it was filled with water and food coloring to add some fun to the table.

We filled the table with blood bags, pumpkin seeds, bloody brains, trapped souls, eye of newt, zombie fingers, and other great Halloween candy.  We gave everything fun names using our Spiderweb table cards.  I think it helps to bring the party together to add the themed treat names, but also include what the treat really is so that those who are allergic or don't like something can avoid turning into a monster at the party.

Every witch worth her salt, needs a magic mirror, so we had to add Snow White's Evil Queens Magic Mirror to the back of the dessert table for a great addition.


I can't wait to dig in, although it looks like a little of our Ectoplasm has already snuck it's way into someone's tummy.  Good thing there's still a little time before we go haunting.


reade more... Résuméabuiyad

Glazed Maple Walnut Bars-12 Weeks of Christmas Treats

12 Weeks of Christmas Treats Blog Hop | Hosted by MealPlanningMagic.com
Wow, here we are at the halfway point of 12 Weeks of Christmas Treats.  Time is going by so fast, I can hardly believe it.  My flavor choice for bar cookie this week is maple.  There were two very different recipes that I had a hard time choosing between, so I finally decided that I would post them both this week, one today and the other one for Saturday Sweets.

The recipe for today is an unassuming looking little bar cookie that packs a great flavor punch.  A maple-flavored, walnut-filled cake is saturated with a maple-flavored glaze, making a very moist bar cookie.

The recipe is an old one, so uses both baking powder and baking soda, and the method of alternating the flour mixture and milk when adding them to the dry ingredients.  I usually add half the flour mixture, all of the milk, and the last half of the flour mixture.

I think the flavor is enhanced if the walnuts are toasted, but the bars are still very good if they aren’t.

I do have one caution.  When pouring the glaze over the baked bars, pour slowly and evenly.  The glaze sinks into the cookie very quickly and cannot be spread out over the top if you miss a spot.

If you like maple flavor, I think that you will love this Christmas treat.


Glazed Maple Walnut Bars
1/2 c. butter or margarine, softened
1 c. sugar
2 eggs, at room temperature
1 t. maple extract
2 c. flour
1 t. baking powder
1 t. baking soda
1/2 t. salt
1 c. milk
1 c. chopped walnuts (preferably toasted)
1 2/3 c. sifted powdered sugar
2/3 c. milk
6 T. butter or margarine
1 t. maple extract

In a large mixing bowl, cream the butter or margarine and sugar together until fluffy.  Beat in eggs and maple extract.  In a small bowl, stir together the flour, baking powder, baking soda and salt.  Stir into creamed mixture alternately with milk, mixing until well blended.  Stir in the walnuts.  Spread mixture in a greased 10x15-inch jelly roll pan.  Bake at 350 degrees for 20 to 25 minutes.  While cookies are baking, combine powdered sugar, milk and butter or margarine in a medium saucepan.  Cook and stir over medium heat until mixture comes to a full rolling boil.  Remove from heat and add the maple extract.  Set aside if cookies are not yet done.  Remove cookies from oven and prick top all over with a fork.  Slowly and evenly drizzle glaze over hot cookies.  Cool cookies in pan on wire rack.  Cut into bars.  Makes about 48 cookies. 


12 Weeks of Christmas Treats is hosted by Brenda from Meal Planning Magic.  There are still 6 weeks left to join in the fun.  You can find the sign-up information in this post.

reade more... Résuméabuiyad

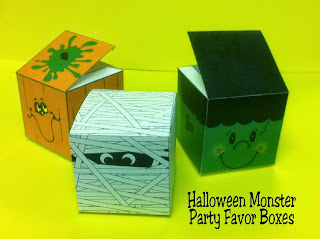
Monster Halloween Printable Box Party Favors

Halloween Printable Party Favor Boxes by Kims Kandy Kreations

I've got my Witch's Cupboard Halloween Dessert Table almost done and ready for the big day.  I'm super excited with how it has turned out.  Except that I didn't have a party favor for my guests to take home.  Sure, they will probably have a bunch of candy, but what about that sweet little "Thank You For Coming" treat?


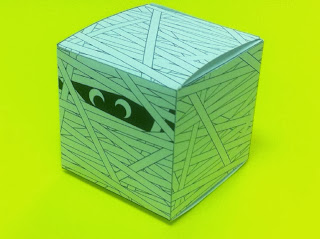
Mummy Halloween Party Favor Box Printable
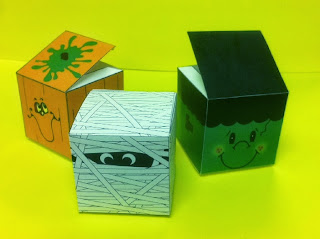
So I spent last night designing while catching up on some of my TV and came up with this fun Mummy Halloween Party Favor Box.  It's designed just the same as our Dice Party Favor box.  It's 2 inches by 2 inches by 2 inches.  That's a big enough size to fit some chocolate covered oreos or Bloody Brain Cake Balls or some Pumpkin Face Hershey Kisses.

Pumpkin Halloween Party Favor Box Printable
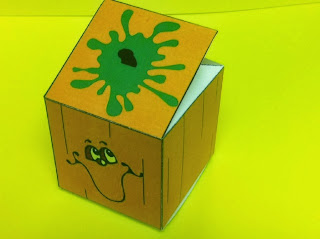
In fact, I love these little boxes so much, that I kept going and made a Pumpkin Party Favor Box

Frankenstein Monster Halloween Party Favor Box
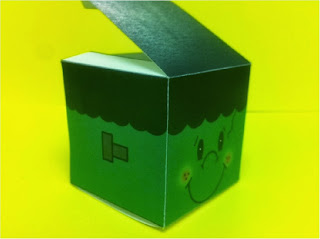
and a Frankenstein Monster Party Favor Box.

They are super easy to put together.  Simply save the file, print it, and cut it out the outside of the box.  Then score the inside lines, fold, and glue each box together.  Really easy and super cute!

Hallween Mummy Party Favor Box Free Printable

And to show you, I'm sharing the Mummy Box with you for FREE!  Just right click to save him and print him onto card stock for a sweet party favor for your Halloween party.

Monster Halloween Party Favor Printable Boxes
If you want to make the trio, you can find the Pumpkin Party Favor Box HERE and the Frankenstein Party Favor Box HERE.

Now I just need to figure out what I'm going to put in them.  What would you fill them with that would make your guest's mouths water?
reade more... Résuméabuiyad

Chocolate Chip Cookie Brownies


Do you want a quick and easy, but SUPER yummy dessert for after dinner tonight?  These brownies are considered our "Luke Skywalker" brownies since they have both a dark side and a light side.  But they are TOTALLY worth putting up with a Darth father or Goodie son to enjoy.   (Yea, there's my cheesy nerd side peeking out a little.  Bet you didn't know I was a big Star Wars fan.)  But trust me, these are THAT good.

And if you've read my blog for anytime, you may remember Daredevil wants to own a brownie store someday, so we like to experiment with new brownie ideas and recipes.  This was the result of one of those experiments gone right (for a change!)


All you need is one box of your favorite brownie mix and one bag of (powdered) chocolate chip cookie mix, plus all the fixings for each.  Betty Crocker is our family's favorite.

Make up each of the mixes in seperate bowls.

Add your brownie mix into a 9x13 inch pan and bake for 10 minutes.

Remove from oven, brownies WON'T be done yet.  Spoon your chocolate chip cookie dough on top of the brownies.  Using a knife, swirl the brownie and cookie dough mix together.

Return to the oven and bake for another 10 minutes.  Let cool.  Cut brownies and ENJOY!

See, I told you it was easy!
reade more... Résuméabuiyad

Lemon Marshmallow Bars-12 Weeks of Christmas Treats


12 Weeks of Christmas Treats Blog Hop | Hosted by MealPlanningMagic.com


Back at week 2 of this year’s 12 Weeks of Christmas Treats,  I posted this photo of some recipes I had made that just did not turn out quite like I had hoped.  One of the recipes was for Lemon Marshmallow Bars.  The challenges with the recipe that I made at that time were that the topping would not cut without cracking and that (I thought) the crust was too thick.

The bars, however, were very good.  In fact, a coworker said that this was perhaps one of the best sweets I had ever shared with her.  I decided to make the recipe again, making some changes that I hoped would help.  I baked the crust in a 10-x15-inch jelly roll pan instead of a 9x13-inch baking pan.  This made a thinner crust that pleased me more.  I eliminated the melted white chocolate chip topping and used my favorite frosting recipe instead.  This made a topping that cut nicely.  Now this is a cookie that I am very happy with, and I will use the base recipe often.

Because the flavoring for these bars comes from flavoring extract, it would be very easy to make them in other flavors such as cherry, orange, banana or mint.
 
I am developing some arthritis in my hands and find that recipes that call for cutting butter or margarine into dry ingredients are now more difficult for  me to make.  A little trick I have come up with is to use the whisk attachment on my Kitchen Aid mixer to do this for me.  I put the dry ingredients in the mixer bowl, cut the butter into slices and put on top of the dry ingredients.  Then I run the mixer on low until the mixture is crumbly, stopping and cleaning the whisk attachment when necessary.  This is much easier than cutting in the butter by hand.

The homemade marshmallow filling is very easy to make, but it really does need to be made with a stand mixer.  The marshmallow takes 10 minutes of beating at the highest speed which can get very tiring if using a hand mixer.  Because of the marshmallow center, the bars are most easily cut with a dampened knife that is cleaned frequently, and it will be necessary to give a little extra “push” to cut through the crust.

The original recipe came from M.m.m.m. More Cookies by Pillsbury, 1987.  It is one of those little cookbooks that are displayed at the check-out counters of grocery stores.


Lemon Marshmallow Bars
1 1/2 c. flour
2 3/4 c. sifted powdered sugar, divided
1  c. butter or margarine, divided
1 c. water, divided
2 envelopes unflavored gelatin
2 c. sugar
1 t. lemon extract
1 T. grated lemon peel
8 to 12 drops yellow food coloring
2 T. hot water
1 T. lemon juice

Place flour and 3/4 c. powdered sugar in a mixing bowl.  Cut in 3/4 c. butter or margarine until mixture is crumbly.  (See note above for doing this with an electric mixer.)  Press mixture into a foil-lined 10x15-inch jelly roll pan.  Bake at 350 degrees for 15 to 18 minutes until light golden brown.  Remove from oven and set aside to cool.  In mixer bowl, combine 1/2 c. water and the unflavored gelatin.  Mix well and set aside.  In a medium saucepan, combine sugar and 1/2 c. water.  Bring to a boil over medium heat and boil two minutes.  Pour over gelatin mixture and mix well.  Set bowl in refrigerator for 5 minutes to cool.  Beat mixture at highest speed of electric mixer until very thick.  This will usually take about 10 minutes.  Add lemon extract, food coloring and lemon peel.  Beat well.  Spoon marshmallow mixture over cooled crush spreading as evenly as possible.  (The pan will be very full.)  Place in refrigerator to set.  When set, prepare topping by melting 1/4 c. butter in a large glass measuring cup.  Add 2 c. of sifted powdered sugar.  Mix well.  Stir in the water and lemon juice to make a spreading consistency.  Spread over the top of the marshmallow mixture.  Let set and cut into bars with a moistened knife.  Store covered with plastic wrap in refrigerator.  Makes about 48 bars.


12 Weeks of Christmas Treats is hosted by Brenda from Meal Planning Magic.  We aren't yet half way so there is still plenty of time to join in the fun.  You can got to this post to sign up.  Remember, you are not obligated to post every week if for some reason you can't.

Check out the links below to see what other bloggers have posted this week.

reade more... Résuméabuiyad

Halloween Witch Cupcake Topper Printable

I am absolutely loving how my Witch's Cupboard dessert table is coming together, but I felt like we needed to invite an actual witch or two to the party.  So I made this super cute raggedy Halloween witch cupcake topper and I'm sharing her with you for the next week for FREE!


This cupcake topper is pretty simple to make.  Simple download and print out the cupcake topper.

She's easy to cut out except for the little hook in her hat.  Even that's not too hard, just a little tricky.

Now add a toothpick or sucker stick to the back of the witch to stick into the cupcake.
See, told you it was easy!

Now you can go HERE and download your Halloween Witch Cupcake Topper.  Do it today so you'll have it next week when you need to scare all the goblins and ghosts that are coming to your home.


reade more... Résuméabuiyad

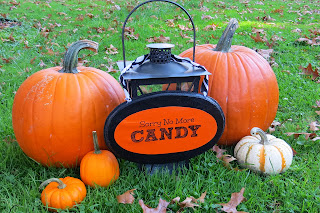
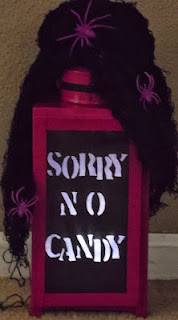
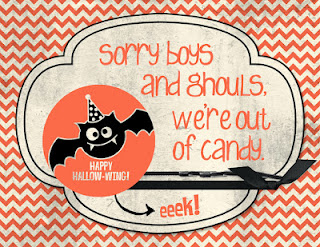
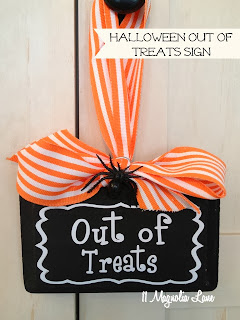
5 No More Candy Signs

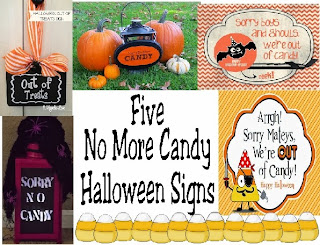
Five No More Candy Halloween Signs by Kims Kandy Kreations

When I was a child, you didn't go trick or treating at a house if the porch light was off.  It was the RULE.  I guess I thought everyone knew that.  But when I got older, even after the porch light was turned off, I found we had trick or treaters coming to our door well into the night.  It was the most amazing thing to me.  Didn't they know?

This year, the kids will know.  This year, I'm making one of these signs to let them know that we're out of candy and they can stop ringing the doorbell.  After all, are my kids the ONLY kids that still have some kind of bedtime on Halloween??


Sorry, No More Candy Sign by Through the Eyes of the Mrs.
1. Sorry, No More Candy Sign by Through the Eyes of the Mrs.

Sorry No Candy Glowing Sign by Mommy Miaa.
2. Sorry No Candy Glowing Sign by Mommy Miaa.

Out of Candy Sign by Stamping with Erica.
3. Out of Candy Sign by Stamping with Erica.

Halloween Out of Treats Sign by 11 Magnolia Lane.
4. Halloween Out of Treats Sign by 11 Magnolia Lane.

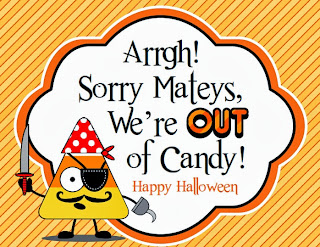
Pirate No Candy Sign by Unknown.
5. Pirate No Candy Sign by Unknown.

How do you keep kids from knocking on your door all Halloween night?  Is there a trick that I don't know?  If so, PLEASE share!
reade more... Résuméabuiyad
Printable Halloween Dominoes Game

Halloween is really an outdoor holiday for the most part.  There's hay rides, pumpkin patches, and of course, trick or treating.

But what do you do when you live somewhere it's super cold and snowing on Halloween?  That's how it was for me growing up.  We lived in NORTHERN Maine where you didn't even need to bother wearing a costume since it would be covered in a snowsuit anyway.  My kids are lucky that qthey haven't had to deal with that extreme, but some holidays it s pretty cold.

So when they are done trick or treating, we do like to come home and have a tall glass of hot chocolate while going through the "haul."  This year, I think we'll add a new tradition and spend the time winding down with our hot chocolate and a game of dominoes.


And what better way to play dominoes than with a set of printable Halloween Dominoes which are fun to play and easy to make?


It's a simple matter of downloading the file, unzipping it, and printing off the 7 pages of dominoes.  Then, cut them out...and play!


These Halloween Dominoes are super cute too!  They have ghosts, witches, scarecrows, black cats, draculas, skeletons, pumpkins, and a blank dominoe.  These are all perfect for little kids since the graphics are fun and not scarey.


This would be the perfect game to play at a Halloween party or to wind down a full day of fall festival activities.  If you want to make a set for your monsters, you can download the Halloween Dominoes HERE for free.
reade more... Résuméabuiyad
10 Fun Halloween Decorations from our Favorite Sponsors


Halloween is only two weeks away!

 I can't beleive how fast time is flying.  My kids have begun their costumes (hooray for us for not waiting for the last minute this year!), the Witch's Cupboard dessert table is almost all planned, and the home decorating has begun.

But as always, I'm still out there looking for the perfect decoration that will make my Halloween party stand out.  If you are in the same boat, you still have time to check out a few of my favorite decorations from some of our blog sponsors.  Maybe one of these is exactly what you need to add that extra Sparkle or Freakiness to your Halloween party.


1. This Spooky Tote would be great to use for all the candy you'll get while you're out Trick or Treating on Halloween night.  It's big and the handle is sturdy and comfortable, both of which is a BIG plus when your candy basket is full at the end of the night.


2. Aren't these the cutest Ghost figurine candles? They make me smile just looking at them with their happy faces and fun Halloween color scheme.  They would look so bright on your fireplace mantel or as a holiday night light on the darkest of nights.

3.  If you're trying to scare your little trick or treaters or amuse your party guests, this Halloween ghost will be the star of your show.  He's just the right size to a little pizazz to your party with out too much spookiness.

4. You've gone to all the work to create a yummy Halloween dessert table, so why not push your guests in that direction with this fun Candy Corn decoration?  It would be a great table centerpiece or hanging eye piece in such stunning colors that everyone's mouth will water.

5. Don't forget to decorate the outside of your haunted mansion with this Light Up skeleton.  I love that it lights up so when Halloween night hits and all is dark, you can still see this crazy skeleton trying to climb out of the grave.  (Plus you can get 20% off of him with coupon code HUGE20)

6. Maybe it's just me that thinks of Harry Potter when I start thinking witches and halloween, but if not, this Feathered Owl looks just like Hedwig and would be a great addition to your party.  He would look great sitting on your mantel or in a castoff cage looking over your dinning room. (Plus, he's also 20% off right now with code HUGE20)

7. How about a FREE Personalized Tote bag for your little munchkin?  (Just pay shipping.) No one will mistake whose candy bag this one is with your little one's picture right on the front.  Of course, then when you're caught sneaking the candy out the next day, you won't have an excuse, so maybe that's not the best idea.

8. This Skeleton Restroom Door Cover just makes me giggle every time I see it.  Wouldn't this be a great banner to hang on your bathroom door?  It might make your guests pee their pants, but it would make a great story for the next day and for years to come.

9.  My Dear Hubby is deathly afraid of spiders, so I can't have too many at our Halloween party, but these cute little Halloween Spider Tea Light Candle holders would make a fun addition to our Halloween party.  The sparkle and sweetness can't help but make anyone smile and not be afraid.

10.  If you want to make a Haunted Mirror or just a freaky frame for your Halloween party, this WOWindow Posters Green Faced Demon Halloween Window Decoration would certainly be an easy and scary addition to your Halloween party.  He kinda gives me the creeps just looking at him.

If you're planning a Halloween party, please go check out our great sponsors for some freaky and sparkly additions perfect to get your scare on!

reade more... Résuméabuiyad