Pages

Gift Idea Week: Altered Composition Notebook

A useful gift is always one of the most appreciated gifts you can give! So giving a cute composition book which can be used as a notepad, a journal, an address book, or idea book is a great idea!  You can also use this idea to give a mini composition book which fits perfect in a purse, a car, or beside the telephone for a fun "thinking of you" gift.

Start by taking a regular composition book.  You can find these at most stores in the office supply aisle.  If you're thinking ahead, you can pick these up for $0.25 during the Back to School sales at Walmart and other stores.

Now find your favorite paper and grab your Modge Podge.  You can also use your tape gun or permanent cartridge on your Xyron machine, but I'll be using Modge Podge today.  (It's my friend this week!)

Cut two of the papers for the front and back of the book at 7 inches by 10 1/2 inches.

Modge Podge the front of your composition book with a thick coat of glue.

Lay your paper up against the edge of the black border making sure to center it on the notebook.  You will have a little bit of paper hanging off three of the edges, but this is okay!  Be sure to press the paper down securely to adhere it to the glue on the notebook.

Open up the book and trim the corner in a V-pattern.  (Not where my scissors are, they just got in the way.)  Cut where the edges start to round.  It's helpful to score the edges of your paper along the book line so it's easier to fold if you have heavy paper or card stock.

Modge Podge the edges of the book where the paper will fold over.  It's easiest to work in sections so that your Modge Podge doesn't dry before you are ready to fold.

Start with the corners and fold them in.

Fold the bottom up and then the side.  You will need to place a little bit of Modge Podge in the corners to make sure the paper glues down onto the corner and bottom edges.

To make the book look more "finished" cut a coordinating piece of paper 7 1/2 inches by 9 3/8 inches.  This size will allow you to see a little of the front paper around the edges, so if you don't want that, re size it bigger or smaller.  When your paper is cut, Modge Podge the inside of the cover and place the paper inside making sure to press securely. 
Let the paper dry.


If you like your paper alot, you can leave it like it is and give as a gift.
But if you have some talent, or purchase some cute paper crafting accents, you can embellish your altered composition book to match your gift recipient or any theme.

Here are some really cute examples from fellow bloggers...


(Don't you just LOVE the side tabs? Such a great addition!)
reade more... Résuméabuiyad

Gift Idea Week: Wooden Name Letters

I thought this week we would try something different and share some fun craft ideas that you can give as unique gifts for all the parties, baby showers, and events that you and your kids are invited to.  The end of the school year is coming too, and it might be a good idea to say Thank You to the teachers and staff at your child's school in a "non-apple" way!  So it's now officially "Gift Idea Week" here on our Blog...I hope you enjoy!

This is probably my FAVORITE new project idea.  I have made several different versions of this, saying many different names and words.  Our family name was my first attempt and I still LOVE to look at it on my mantel because the colors and different papers just make me happy.

To start, you need to purchase some wooden letters.  I found mine at Jo-Anns last week when they were on sale.  They go on sale every couple of months, so watch for them.  Or if you are patient, you can use the 40% off coupon at Hobby Lobby and purchase one every time you go in.  That will probably save you money in the long run, especially if you are making a long name or word.

Unless you already have a HUGE stash of paper, you need to look for some cute pieces while you're buying your letters.  I do have a bit of a pile already, but I saw this cute paper stack at Jo-Anns and it was perfect for my kitchen.  Love the cupcakes, sweets, and chocolate colored papers in the stack.  (I justify it because it was on sale and I'm sure I'll find a few other uses for this Adorable paper!)

Picking out what paper you want and in what order is probably the HARDEST part of this entire project.  You want to try and make sure the colors and designs in the paper play off of each other.  Also, a note, if you're going to place this on a dark background, you might try starting with a light colored paper, or doing a dark letter if it will be on a light background.  That just helps the letter stand out a little more.

Once you have your paper picked out, turn it over and trace your letter onto the backside.  Make sure you turn your letter over too so the paper or letter won't be facing the wrong way when you get it all together.

If you want to make sure you get a certain design on the paper, you can outline it on the front, just be careful that you trace dark enough so you can see the lines.  You do want to make sure you trace pretty close to the letter so you don't have alot of excess paper around it.

When you cut out the letter, do it just on the inside of your trace line.  This way, you won't see the mark if you traced on the front of your paper and you'll also have less paper around the outside of the letter.

I guess this is a good time to mention that if you purchase your letters and you don't want the back and inside of your letters white or a wooden color, you need to spray paint them now.  You can go back and do it later, but it's much harder and a little more stressful.

Now that your letters are ready, paint the front of them with a good layer of Modge Podge.  Make especially sure that you get the edges of each letter, you don't want it peeling up later!

Now place your paper letter on top of the glue on the wood letter and smooth it down.  Use your fingers to arrange the letter so it's on straight and smooth out any air bubbles.  It's pretty easy to move it right now, so get it how you want it.  You may find you have a few air bubbles later, especially if you chose to use thinner paper, but don't worry, most of them time, you can't tell at all!

Once you have your paper on to your satisfaction, paint another thin layer of Modge Podge on top.  This does a few different things...it will keep the letter from getting ruined if you spill something, especially if you have this in your kitchen.  It will also make sure your edges won't peel up later.

At this point your letter will be coated pretty good in Modge Podge.  If you have extra paper on the edges, you can take your finger and smooth it over the edge and down the side.  Use the glue on the Modge Podge to hold it down by running your finger nail along the edge.  The result makes the letter look a little more "finished" and you don't have paper catching off the sides.

When you were messing with the edges, most likely you messed the Modge Podge on the front of the letter too.  I like my Podge to be straight and not have swirls in it.  So at this point, I usually run my brush over it again up and down so my lines are smooth.

Be careful as you do a last minute smooth of your letter, the paper is wet now and can easily rip.  I had that happen, but hid it by adding some paper craft flowers that I purchased.  It actually added a nice touch to the letter and I might consider adding some more as accents on purpose next time.

Add the paper to each letter by following the same steps.  Then let your letters dry good.  It really doesn't take long, but you don't want to mess them up by hurrying.


You can do this with almost any word or name.

My daughter wants her room to be blue and green when we move, so we did her name in coordinating colors.  (Right now it sits on her make-up table since it clashes with the little girl colors her room currently is in.)

This week we also did PRAY as a women's Enrichment Activity for our church.  It turned out so cool and will eventually sit beside my bed reminding me to Pray each morning.

There are so many different ideas you can use this for!

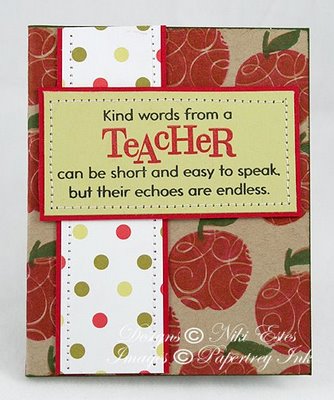
How about doing "READ" for a teacher's gift?
 Or "FOOTBALL" for a coach?
Or "DREAM" for a graduate?
You can even do "NOEL" or "BOO" at the holidays? (I can't wait to personally try that!)

So many different ideas!  What would you do?


reade more... Résuméabuiyad

Shout Out Sunday -- Teacher Edition


With the end of School coming this month, I wanted to share some great Teacher Thank You gifts from fellow blogging friends.

Nothing but Country shared this yummy treat filled Candy Bucket.  What better way to say thanks at the end of a long school year than by giving a bucket full of candy?  I know I'd feel loved and appreciated!  They even share the poem printable so you can make your own Teacher gift.

I Saw That... shared some fun Teacher Appreciation ideas.  These ideas use everyday items that most teachers either need or want and add some extra cute tags to turn them into a fun gift.  Your teacher will definitely love these pens, paperclips or yummy gum as a sweet thank you gift.

The Crafting Chicks made these Apple Chocolate covered Oreos.  YUMMY!   I wonder sometimes if teachers get sick of apple themed gifts, but I can't image any teacher wouldn't love these!  The Crafting Chicks dipped oreos in red chocolate and used pretzels and air head candies to make the apples. These would be a great gift for your teacher, or your favorite blogger. (hint..hint)

Sweet Sugar Belle shared these fun Teacher Appreciation Cookies.  If you've read my blog at all, you know I'm a HUGE fan of Sweet Sugar Belle's beautiful work, and I KNOW your teacher would totally LOVE these cookies.  After having tried her frosting technique on my Easter Cookies (with a little impatience), I think these cookies are totally do-able for even the average baker....especially using her detailed steps on how to cut out your cookies into fun school shapes.

Chrissy's Crafts shared this yummy Teacher's Appreciation Gift using a toilet roll, cute paper, and some yummy Bliss Candies.  You all know how partial I am to chocolate and candy gifts.  This is just so cute.  I LOVE using a play on words in gifts and this is such a simple and uber cute idea.

reade more... Résuméabuiyad

Shindig Saturday Weekly Linky Party #13

It seems that I have spent most of my week working on this...

My first sustained craft arts as a child were in Counted Cross Stitch.  I remember watching my mother work hours on these beautiful creations to decorate our home with, so when I became a young woman, I wanted to make them too.  I picked out this fun Care Bear pattern...I remember it was Wish Bear.  I spent hours, and hours, and hours on that bear learning to sew cross stitch.  I never finished him.

I did go on to finish many other projects, but I learned that I didn't have the heart for cross stitch.  I wanted something that would be functional as well as beautiful.  So I found Plastic Canvas.  LOVE IT!  Unfortunately, there aren't near as many great plastic canvas books out there as Cross Stitch, but I've learned to make my own patterns and to adapt ones that are out there.

That's what this train was...an adaptation.  It took me hours to make this train, to adapt it to be able to add pictures to it, and to make it be able to hold small objects.  But it was a labor of love, you see as much as I love my computer and my other crafts, it's nice to have something different sometimes.  Something that for most part, I can just sit and watch TV and sew...not a lot of thinking or stressing involved.

So I sewed ALOT this week, almost every moment.  But I got a lot of TV watching in too.  That's something that I don't really do a lot of.  I like ALOT of shows, but I really don't have time to watch them, not in between projects, kids, after school activities, church responsibilities, and house cleaning. I just don't watch that many.  But this week, I was able to watch a few series that have been on my back burner to check out.  They've been sitting in my DVR for months without having watched...and this week I watched most of them.  (Is that just a little scary or what?)

I have my favorites... Grey's Anatomy, V, Bones, Biggest Loser...and such, but these were some that I like just don't have high on my priority list to catch every week. 


Stargate Universe.  Loved the Stargate series and although this wasn't my favorite, I enjoyed it.  I was a little sad to see it end...seems too many of some good series are ending.

No Ordinary Family.  Never had time to catch this one before...so it was a newbie for me.  But I have enjoyed it overall.  A cute, family show with a lot of super hero silly action.  I love that the son has a super brain as his power.  It's a power that's actually attainable for my 10 year old to dream about.

The Closer.  Love me some Brenda Lee!  It makes me laugh, especially on the Christmas episode, where they can solve a whole murder in just a few hours or days.  Somehow I don't think that's really how it works, but I enjoy it anyway.  Love the way her brain works too, and especially her chocolate cravings!  Now there's a girl I can relate too!

So what are a few of your guilty pleasures?  I'm debating on whether to start a new project now and need some new shows?  Although I admit, my DVR is still packed with too many shows...but hey, I can always use more?  My house still has lots of places for more Tissue boxes!

The winner of last weeks Noah's Ark Cupcake Wrappers is...
Pam's Party and Practical Tips.  We've featured Pam before because I ABSOLUTELY LOVE her amazing parties.  They are so fun and original...plus, they aren't unattainable like some of the party shoots that are out there.  She really did these and it's possible for us to too!

I really love her other ideas and the fact that she shares so many great tutorials from around the web.  You can get where to find the directions on making a pinata, a cupcake tree, or a fruit flower bouquet.  She also shares her amazing shopping deals each week, so if you have those stores near you, you can get some great deals too...alas I haven't been that lucky yet, but maybe after the move!

You really need to check out her blog!  Especially the great Dinosaur party that she shared last week.  It's really amazing!

This week's giveaway is a set of our Baseball Cake Party Boxes
These party boxes are just in time for your end of the season baseball party.  All 12 boxes fit together to make a round baseball cake that you can fill with your favorite treats for a unique party favor.  You will receive 12 flat boxes with easy directions for assembling to make your own fun Baseball cake.

To ENTER, just join our Linky Party by sharing your favorite party themed craft, table scape, photo, favor, or whatever! I'm pretty flexible since just about everything can be used at a party...that's the great thing about us moms! We can see the potential in ANYTHING!
(We'll use a random generator to pick the winner next Friday evening.)

Linky Party Guidelines:
* Link up to your OWN project post, not just your blog, but your actual post. (We want to see it!)
*Grab a Shindig Saturday button for your post or blog page. (Hey, it benefits us all!)
*Stay and enjoy the party by visiting and commenting on other's projects. (It's fun to mix and mingle!)


reade more... Résuméabuiyad