Pages

Friday Finds

Since this is Foodie Penpal reveal day, and I have already put up that post, this is post number two today.  I could have skipped it I suppose, but there are goodies I found this week that I want to share.

The first two are going into my homemade Chinese/oriental dish recipe file.

Morsels of Life

This wonderful looking recipe is from a regular contributor to Friday Finds, Morsels of Life.   I like that this is a good base recipe that I can do lots of things with.

Hezzi-D's Books and Cooks

I have deep-fried and slow cooker Sweet and Sour Chicken recipes, but this baked one seems like a good idea.  It seems that I have somehow managed to miss the original post for this one so I am glad I found it reposted.

Yummy-Healthy-Easy

I have a box of Golden Graham cereal that I have had for awhile.  This, this wonderful concoction is what I am going to make with it.  I can't wait!

Chocolate, Chocolate and More Chocolate

This looks like a simple, easy recipe.  Since I make my own Homemade Sweetened Condensed Milk, and this uses almonds, this recipe should be inexpensive to make.  I like the almond idea, but I imagine that you could also use hazelnuts.

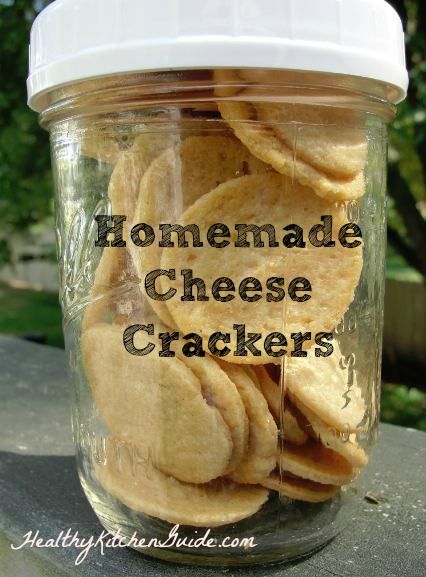
Heather's French Press

OK, I am trying to convince myself that these would be a little healthier than the real thing.  These look so yummy, I'm not sure that I care.

High Heels and Grills

Now before I completely toddle off into sweets land, here is one last chicken recipe link.  This recipe comes from a new-to-me blog from a couple.  Zach does a Manly Monday, and this is one of his posts.  Let's see, I have chicken, I have root beer, I have Monday off.  This should probably be on my dinner menu.

All photos were taken by and are the property of the owners of the respective blogs represented.

I am linking up to Friday Favorite Finds over at Finding Joy in My Kitchen.  Hop on over there with me to see what other bloggers have found on Pinterest and around the web this week.


reade more... Résuméabuiyad

Foodie Penpal Reveal Day

The Lean Green Bean


It is the last day of the month and time for another Foodie Penpal reveal; or, as I like to say, what I got from Santa this month.  It always feels like Christmas when my package comes, and I am just like a kid and can’t wait to open it.

Foodie Penpals is hosted by Leslie over at The Lean Green Bean.

This month my package came from Wendy Nielsen.  I don’t know if she has a blog, there was not one listed.  You do not have to be a blogger to participate in Foodie Penpals.
 
Wendy sent me some great goodies:


IMG_3427-1

These didn’t last very long.  I had to share them with hubby.  He insisted.

IMG_3445-1

This tea is very good and will be really great to sip once the weather cools down.

IMG_3439-1

This says Grill Mates, but I like it sprinkled on veggies and eggs.  I like to use different herb/spice blends but had not tried this one.

IMG_3434-1

HOMEMADE blueberry jam.  It is always wonderful to get something homemade.  I am not much of a blueberry person, but this was good.  Hubby really appreciates it.  He is a blueberry person.

IMG_3431-1

And then there were these!  Oh My, I did not even know that there were coconut Oreos.  The ones I ate were so good I decided I wanted to use the rest in a dessert, so tune in tomorrow for that post.

Thanks again, Wendy, for a great package.  My package went to Sheree Weaks.  I am not sure that she has a blog either.

If you would like to join in the fun and get your own Foodie Penpal package each month, here are the details straight from Leslie’s blog.  Go here to sign up by the 4th of September.

-On the 5th of the month, you will receive your penpal pairing via email. It will be your responsibility to contact your penpal and get their mailing address and any other information you might need like allergies or dietary restrictions.
-You will have until the 15th of the month to put your box of goodies in the mail. On the last day of the month, you will post about the goodies you received from your penpal!
-The boxes are to be filled with fun foodie things, local food items or even homemade treats! The spending limit is $15. The box must also include something written. This can be anything from a note explaining what’s in the box, to a fun recipe…use your imagination!
-You are responsible for figuring out the best way to ship your items depending on their size and how fragile they are. (Don’t forget about flat rate boxes!)
-Foodie Penpals is open to blog readers as well as bloggers. If you’re a reader and you get paired with a blogger, you can choose to write a short guest post for your penpal to post on their blog about what you received. If two readers are paired together, neither needs to worry about writing a post for that month.
- Foodie Penpals is open to US, Canadian residents & UK residents.  Please note, Canadian Residents will be paired with other Canadians only. We’ve determined things might get too slow and backed up if we’re trying to send foods through customs across the border from US to Canada and vice versa. So, I’m going to keep two separate lists and match US w/ US and Canada w/ Canada!
***If you’re in the UK, please contact Carol Anne from This Is Rock Salt at rocksalt@thisisrocksalt.com to get involved!

Linking to August Foodie Penpal Reveal Day 

reade more... Résuméabuiyad

A Teacher Can't Live by Apples Alone Teacher Gift

You know those ideas that you have that seem so easy when you come up with them?  Well, this was one of those....but it was also one that was so darn hard to execute.  And not because the project itself was hard, it just seemed like everything went wrong. 

But in the end, I love how it turned out and will be sad to let this little beauty go visit another home.  Hopefully my kids' teachers will love it as much as I.
When I saw these lovely candlesticks on Pinterest, I knew I had to have a set and wanted to play with the idea of how to do them on other items.  It took me a while to track down the original pin and where it was pinned from (can I say "Pet Peeve"---pin from the SOURCE people!)  It was a message board with a little bit of direction...of course, I can't find it now, so I'll have to keep looking and let you know when I find it.

The idea said to use regular Elmer's school glue and food color to achieve the sea glass effect.

I mixed mine up in an old sour cream container with a lid since the original poster said she had to put several coats on the glass to make it look so pretty.

My first attempt turned out BEAUTIFUL, but way too pink for the apple look I was going for.  I'm glad because now I have a jar for myself, but it ended up costing me a day.  I had to go home and find some red food coloring instead of the rose color I had tried.

My second attempt turned out better.  I don't know if you can tell from the pictures, but it's a beautiful red sea glass color.  In the light, it is so pretty.

I filled the jar with Hershey Hugs candy.  It took about 1/2 a pound to fill one of the small mason jars.

During all my stress time trying to get everything together for this project, I spray painted the lid to the jar and a small empty thread spool.  (At least I got something accomplished during that week when I couldn't get it all together.)

I glued the spool on top of my jar to look like an apple.  (If you stretch your imagination...you can see it right?)

To finish off my project, I printed out the tags that went to our Teacher Hugs Candy Topper set.

Using the curly ribbon style that I showed you on my Candy Bouquet tutorial way back when, I tied the tag to the top of the "stem" on the candy jar apple.

Now it's ready to go make a teacher's day with a few hugs!

reade more... Résuméabuiyad

Easy Beef Enchiladas

Here it is another week, and I want to wish a warm welcome to my new followers.  Thank you for following my blog and thanks once again to all those who take the time out of your busy lives to stop here for awhile.  It is truly appreciated, and I hope what you find here is useful.

This is another freezer/pantry shelf recipe that can be made with ingredients easily kept on hand.  It appears on our table monthly.  Hubby and I get a good meal, and there is plenty leftover for him to eat a couple of evenings while I am at work.

I make my own red enchilada sauce and am including the recipe.  However, purchased sauce could be used.  I think it would take a couple of cans to equal the amount of sauce that the recipe makes.  I put the tomato sauce into the pan before the water and then use the can to measure the first cup of water.  This rinses out all the tomato sauce.  I am a wimp when it comes to spicy foods so use only1 T. chili powder in the sauce and 1 t. chili powder in the ground beef.

I use my already browned frozen ground beef which usually has onions, celery, and red peppers in it, but I like to add additional onion and red pepper when I heat the ground beef for this recipe.  I think that I helps to give the dish a fresher taste.

 
Easy Beef Enchiladas

Enchilada Sauce
1 T. minced garlic
1 (8 oz.) can tomato sauce
2 1/2 c. water
1 to 2 T. chili powder (I use 1 T.)
1/4 t. salt
1 t. cumin
1 t. oregano
1 (4 oz.) can diced green chilies, drained


Beef Filling
1 lb. lean ground beef
1 c. chopped onion
1/2 c. chopped red or green pepper
additional chili powder to taste (I use 1 t.) 

10 (8 inch) flour tortillas [or 8 (10 inch)]
1 1/2 c. (4 oz.) shredded sharp Cheddar cheese
1 c. (4 oz.) shredded Monterey jack cheese  OR
2 1/2 c. (8 oz.) shredded Mexican Blend cheese

In medium saucepan, combine garlic, tomato sauce, water, chili powder, salt, cumin, oregano, and green chilies.  Bring to a boil, lower heat and simmer 30 minutes.  Meanwhile, brown ground beef and onion in medium skillet.  Add 1 cup of the enchilada sauce to the ground beef and continue to cook beef until the sauce has been absorbed, about 5 to 10 minutes.  To assemble enchiladas, heat a tortilla either in the microwave for about 10 seconds or in an ungreased skillet for about 15 seconds per side.  Dip tortilla in sauce,  fill with about 1/4 c. of beef mixture and top with about 1 T. of cheddar cheese or Mexican Blend cheese, if using.  Roll up tortilla and place seam side down in a greased 9x13-inch baking dish.  Repeat with rest of the tortillas.  Pour remaining sauce evenly over tortillas.  Sprinkle evenly with remaining cheese and bake uncovered at 350 degrees for 30 minutes.  Let set 5 minutes before serving.  Makes 8 to 10 enchiladas.

Linking to:  Mop It Up Monday
Recipe Sharing Monday
Melt in Your Mouth Monday
Must Try Monday
Mangia Monday
Made by You Monday
Making Monday Marvelous


reade more... Résuméabuiyad

Back to School Personalized Plates

And that my friends is why I'm not allowed to start a book unless I have NOTHING going on.  After telling you about the new Harry Potter series, I thought I would check out the first little bit to see if I'd actually like it...well, I got hooked.  I ended up reading the whole book and starting on the next one.  I'm so bad that way.


Luckily, I had a deadline on my Back to School party so I came out of Hogwarts to make a few last minute decorations.  I've seen directions on how to personalize your own plates on Pinterest, so I knew I wanted to try them for my dinner party.  And I'm so excited to say how well and easy they worked.  The possibilities are endless and I can already see fun Christmas gifts for all my family this year.

I started with a yellow plate from Walmart and an idea of what I wanted.  I used a dry erase marker to test out my design and make sure it worked.  I wanted a ruler theme, so I used the dry erase marker to mark out my lines to make sure they were even.

Once I was sure of how it all lined up, I used a black sharpie to make my ruler lines.  Then I went back and wiped off the dry erase marker.

I loved how the ruler design turned out, but I felt like my plate needed a little something extra.  I thought it would be cool to used colored sharpies to draw an apple or something fun in the middle, but decided to go with a personalization.  I drew lines to look like a writing tablet and added each of my kid's names in the center of the plate.  (Again, I did it first in dry erase to make sure I got it even and liked how it looked.)

Then I baked my plate at 350 degrees for 30 minutes.  I don't know if you need to put it on a cookie sheet, but I decided to do it just to be safe.

I let the plate cool for 20 minutes and then checked it.  I noticed I had not erased all of the dry erase markers in spots, but they wiped right off even after being baked.  But the design I made in sharpie stayed with no smearing or rinsing off.

I'm so excited about how these turned out.  I am a sucker for plates for every holiday and this is a cheap fun way.  You can make them for different holidays, as gifts, as a special plate for a birthday...the ideas are endless!
reade more... Résuméabuiyad

Marble Brownies

I have not been posting nearly enough goodie recipes so I am declaring Saturdays “Sweet Day”. It is no secret how much I like sweet stuff so I will be trying to get a new goodie recipe up each Saturday.
 
This recipe for Marble  Brownies is one I have been making for many years.  I copied it from a book I got from the library.  Even as a child I would borrow cookbooks from the library and copy recipes that I wanted to try.  Of course, I never thought to include what book I got the recipe from on my copy so I don't know the source of many of these.

The process for making these brownies is a bit different from most brownies recipe.  The leavening in these is beaten egg whites, and there is no baking powder or baking soda used.  These have a texture somewhat like angel food cake.

I use walnuts or pecans in these, and I always toast the nuts.

IMG_3478-1

Marble Brownies
4 eggs, separated
2 c. sugar
1 c. butter or margarine, melted and cooled slightly
1/2 to 1 c. chopped toasted nuts
1 1/2 c. sifted flour
1/4 c. milk
2 T. unsweetened cocoa

Separate eggs, putting whites into a bowl for an electric mixer.  Put yolks in another large mixing bowl.  Beat egg whites until stiff.  Gradually add half the sugar, beat well.  Set aside.  Beat egg yolks.  Add second half of sugar and beat until thick and lemon colored.  Add melted and cooled butter or margarine and nuts to yolks.  Stir in flour and milk.  Fold in the egg whites until well blended.  Place 2/3 of batter in a foil-lined 9x13-inch baking pan.  Stir cocoa into remaining batter until well blended.  Drop chocolate batter onto light batter in mounds with a spoon.  Carefully swirl a knife through batters to marble.  Bake at 350 degrees 30 to 35 minutes.  Cool in pan until lukewarm.  Cut into bars.  Makes 36 brownies.

Linking to:  Weekend Potluck
Strut Your Stuff Saturday
Seasonal Inspiration
Weekend Bloggy Reading
Sweets for a Saturday


reade more... Résuméabuiyad

Friday Finds

It's Friday and time for another round of Friday Finds.  (I did remember it was Friday this week.)  I have not been using my slow cooker nearly enough, so this week I decided to look for a few recipes I might want to try.

Here are some slow cooker chicken recipes that I found.

The Pursuit of Happiness

This one looks so good.  I would think that it should be less calorific than the deep fried version.

Cupcakes and Crinoline

This is essentially a sweet and sour version of the above recipe.  Sure do want to try them  both.

Crystal and Company

I agree, comfort food of the best kind.  I think this would even make a great lunch for hubby. 

Shugary Sweets

This looks like a good and easy recipe to throw together for a cool fall day, and we all know they are coming.

I like to make homemade crackers.  They are really very easy and are so much better than the store bought ones.  Here are a couple that I ran across this week that I definitely will be making.

Healthy Kitchen Guide

Annie's Eats

Of course, I had to include a goodie find.  Sometime you run across a recipe that doesn't have a photo that you really have to share.  These Strawberry Lemonade Bars sound wonderful and are a change from the usual bar type cookie.  Strawberries are on sale here this week so seems like a good time to try these.

I am linking up to Friday Favorite Finds.  Just hop on over to see what other bloggers have found this week.
reade more... Résuméabuiyad

Ingredient Spotlight-Taco Corn and Bean Salad


IMG_3373-1

Corn is the Ingredient Spotlight over at Eat at Home today.   I have always liked the so-called Frito Corn Salad that may or may not have originated with Paula Deen, but I wanted a salad that could stand in as a meatless main dish.

I added beans for more protein and taco seasoning to “up the flavor factor”.  I reduced the amount of mayonnaise and added sour cream and cream cheese.  Since I don’t like green peppers, I used red peppers and then green onions to supply the green color.  I also added chopped ripe olives.

Canned corn, cooked, frozen corn, or fresh corn, cooked and removed from the cob can be used for this dish.  About 4 cups or frozen or fresh corn will be needed.

Use your favorite beans for this.  I like pinto or red beans, but black ones add a really nice color contrast.

I make my own taco seasoning to save money and avoid unwanted chemicals and preservatives, but a commercial packet may be used.  There are many recipes for homemade taco seasoning on the internet.  Just Google and keep trying them until you find one your family likes.

Although most recipes have the Fritos stirred into the salad, I find that they become soggy if there is any salad left over.  When I make this for eating at home I just set the crushed corn chips out in a bowl and let people top each serving.  If am taking this to a potluck, I sprinkle the crushed chips on top of the salad.  If there is any salad left over, I tip the bowl and let the corn chips fall into a shallow container.  I put them in a plastic bag and store them in the refrigerator.  When ready to use, I put them on a glass pie plate and microwave them a minute at a time until the corn chips are crisp again.

This salad is best made at least several hours ahead of serving.  I like to make mine the day before.

IMG_3377-1

Taco Corn and Bean Salad
2 cans (16 oz.) cans whole kernel corn, well drained or 4 cups cooked frozen or fresh corn kernels
1 can (16 oz.) pinto, kidney, red or black beans, well drained and rinsed
1 c. chopped red pepper
1/2 c. chopped red onion
1/3 c. sliced green onions
1 can (3.8 oz.) slice olives, well drained and halved
1 (3 oz.) pkg. low fat cream cheese, very soft
1/2 c. low fat sour cream
1/2 c. low fat mayonnaise
1 T. chili powder
1/2 T. ground cumin
1 t. salt
1 t. freshly ground black pepper
1/2 t. paprika (smoked if you have it)
1/4 t. garlic powder
1/4 t. onion powder
1/4 t. dried oregano, crushed
1/4 t. red pepper flakes (opt.)
2 c (8 oz.) shredded sharp cheddar cheese or Mexican blend
1 (10 1/2 oz.) bag Fritos, regular or Chili Cheese corn chips (I usually don’t need a whole bag)

 a large mixing bowl combine corn, beans, red pepper, red onion, green onion and olives mix well.  In a medium mixing bowl combine the very soft cream cheese, sour cream and mayonnaise.  Mix until well blend.  Add the chili powder, cumin, salt, pepper, paprika, garlic powder, onion powder, oregano and red pepper flakes, if using.  Stir until spices are well combined with the cheese/cream/mayo mixture.  Spoon mixture over the corn/bean mixture and stir until everything is coated with the dressing.  Add shredded cheese and stir until well blended.  Cover tightly and refrigerate until serving time.  Just before serving, crush enough corn chips to completely cover the top of the salad.  Sprinkle corn chip on the salad.  Serves 8 to 10.


reade more... Résuméabuiyad

Chicken in Shells Alfredo

This dish, that I make often, is one of those that I call a pantry shelf recipe.  That means that the ingredients can be kept on a pantry shelf and/or in the freezer for an easy meal.  This can also be made ahead and feeds a crown.

Jumbo pasta shells are used to make this.  I find that one package of the shells is more than enough for one recipe but not enough to make it twice.  So I buy two packages of shells which is enough to make the recipe three times.  I cook about 25 to 26 shells and usually end up with about 24 I can actually use.  Some shells always seem to tear apart in when cooking.

Although my favorite  Quick and Easy Alfredo Sauce recipe is at Lynn’s Kitchen Adventures,  I generally use Ragu Classic Alfredo and Ragu Garlic Parmesan sauce to make this.  Otherwise, I can’t really call it a pantry shelf recipe.  I use a jar of each flavor.  They can be mixed together in a bowl, but I just pour each one over the prepared shells and swirl them together with a spatula.  You may,  of course, use two jars of a single flavor.

The veggies can be varied to suit your taste.  I usually use peas and carrots for their color, but just peas as well as chopped broccoli and mixed vegetables can be used.  In the spring, chopped, cooked asparagus is a great addition.

IMG_3446-1

Chicken in Shells Alfredo
25 to 26 jumbo pasta shells
1 (6 oz.) pkg. stuffing mix such as Stove Top
1 1/2 c. water
1/3 c. finely chopped onion
1/3 c. finely chopped red pepper
1 c. frozen peas and carrots or other veggie
1/2 c. mayonnaise (low fat is OK)
2 cans (5 oz.) chicken chunks or 2 c. cubed, cooked chicken
1 jar Ragu Classic Alfredo Sauce
1 jar Ragu Garlic Parmesan Sauce
1 1/2 c. shredded Italian cheese blend

Cook pasta shells according to package directions.  Set aside to cool.  Combine water, onion, red pepper, peas and carrots in a medium saucepan.  Bring to a boil.  Stir in dressing mix, cover, and let set 5 minutes.  Stir in mayonnaise and mix well.  Stir in chicken.  Spoon heaping tablespoonfuls of mixture into the pasta shells.  Place shells in a sprayed 9x13-inch baking pan.  Pour jar of Alfredo Sauce over the prepared shells.  Pour jar of Garlic Parmesan Sauce over prepared shells.  Using a spatula swirl the two sauces together slightly.  Cover tightly and place in a 350 degree oven.  Bake 25 to 30 minutes.  Top with cheese and return uncovered to oven until cheese melts.  May be made up to 48 hours ahead.  Use a glass pan and cover with plastic wrap.  Bake 1 hour 15 minutes.  Makes 8 to 12 servings.


IMG_3422-1

Linking to:  Tuesday Talent Show
Tempt My Tummy Tuesday
Tuesdays at the Table
Tuesday Timeout
Tasteful Tuesday
Totally Tasty Tuesday
Terrific Tuesdays 
Ingredient Spotlight

reade more... Résuméabuiyad

Back to School at Hogwarts

As I'm sending my kids back to school in a week, I'm hoping I'll have a little more "free" time in my day.  Time to get some laundry done (and have it stay done for more than a minute or two), time to enjoy a quiet cup of Hot Chocolate as I enjoy the sun rise over my mountain (yes, I love Hot Chocolate in the fall!), and time to read a book or two.

And I'm super excited too, because I just discovered Hogwarts is back in session now too!


I don't know how I could have missed a sequel to the wonderful world of Harry Potter, but I did.  I only just discovered that Harry Potter's son James has a series of 4 books (so far) that tell his story at Hogwarts.

I'm about 3 chapters into the book and I was a little worried about how I would feel with someone other than JK Rowlings writing the books, but I admit, I'm enjoying it so far.  It's fun to see some of my favorite characters as grown ups and the next generation getting into lots of trouble as they roam the halls of Hogwarts.

I'll let you know how it goes, but if you want to join me, you can't find the series in the local bookstore.  They are only available as E-books to download.  But you can find them for FREE here or on Good Reads here.

reade more... Résuméabuiyad

Friday Finds


Well, some how or another, I managed to completely space out that yesterday was Friday.  So this week, I guess my Friday Finds will just have to show up on Saturday.

I seem to be somewhat in a DIY mode this week so I am sharing some links to great DIY ideas that I must try.


Kitchen Parade

Although I keep a container of powdered buttermilk in my fridge and have used the milk plus vinegar/lemon juice substitute for buttermilk, I prefer to use liquid buttermilk.  The idea of making new, homemade buttermilk using commercial buttermilk as a starter has been around awhile, and it is a good one to be aware of.  This is a very nice article detailing the simple process and even suggests that you can use the homemade buttermilk to make a great Greek Yogurt substitute.

Back4Seconds

As the blogger said, this is one of those "Slap Yourself Upside of the Head and say Why Didn't I Think of That" kind of thing, but I didn't and am glad someone did.  I always have a few packages of chocolate chips on hand and never remember to buy chocolate chunks.  Well now I don't have to.  Great, great idea.

Thrice the Spice

This recipe make enough for 8 lbs. of ground meat; and, of course, you could chose from ground pork, turkey or chicken.  With just spice and a little sugar, this has no nitrates, MSG or other chemical that may be found in commercial sausage. 

Portuguese Girl Cooks

I have been thinking about trying homemade ricotta ever since I saw a recipe for it in "Cooking Light" last year.  With just whole milk, cream, salt and lemon juice, this recipe has no special ingredients.  It does take a candy thermometer to make this, but otherwise the process is simple and mostly "hands off."  Much, much better than the store bought kind I am sure.


Mel's Kitchen Cafe

If you don't already have a special Homemade Ranch Dressing recipe, take some of that Homemade Buttermilk you made and make this one from, the always reliable, Mel.  With the addition of a little olive oil, it seems to have good keeping qualities.  Homemade beats store bought every time.

Well, that ends my Friday Finds on Saturday.  Late to the party, I am linking up to Friday Favorite Finds.  Pop on over to see what other bloggers have found this week.

reade more... Résuméabuiyad