Have you ever been so excited to have learned to do something and then later when you went back to do it again, you forgot how? This is how I am with a lot of my computer projects. I am not the most computer savvy person around (despite having done this for several years now.) It's not usually until I need to do something that I learn how. Otherwise, I'm pretty clueless.
Long ago, I learned how to fill a template in Photoshop. Now, three computers later, I don't have Photoshop anymore. And I'm not paying the huge price tag to repurchase it. So instead, I've been slowly teaching myself how to use Gimp. Haven't heard of Gimp? It's a free image manipulation program that works much the same as Photoshop...and you heard me, it's FREE.
So, before I forget how to do this again, I'm sharing this tutorial on how to fill a template with a custom background in Gimp. In this case, I'm making a Yellow Brick Road alphabet for my Wizard of Oz party.
To begin with, you need to download the Gimp program and open it. You can find it HERE.
To fill the shape you want to use, you will need to open the file in Gimp by going to "File" in the upper left hand corner and clicking "Open." Find where you have saved your template and open it. If you like, you can find the Blank Alphabet file that I used HERE.
Next, you need to prepare it to be used in your design by deleting the white in the background. To do this, go to "Layers" and then "Transparency". This will allow you to "Add Alpha Channel." (In this picture example, I've already done that so the link isn't highlited, but it will be for you.)
To delete the white in the background, you will need to use your "Fuzzy Select" tool. (You can do this by clicking the magic wand tool in the toolbox or by clicking "Tools" and the "Selection Tools" and then "Fuzzy Select Tool."
Once you have this tool, click the area that is white and needs to be removed. You will see a dotted line highlighting the area. Now either click "Delete" or go to "Edit" and then click "Clear." This will make the area into a Checkerboard background to show there is no color left.
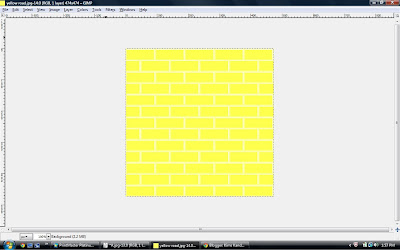
Now to make a custom background in Gimp, you need to find a background that you like. I designed up a Yellow Brick Road background image and saved it as a jpg file. To use it as a custom background in Gimp, you will need to open the file in Gimp and open it, just like you did your alphabet letter or other design.
Now you need to either right click or go to "Edit" and "Copy" your background.
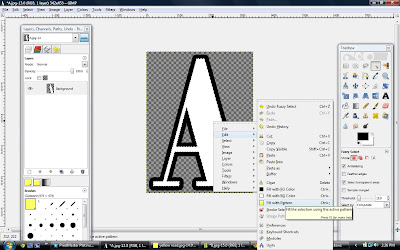
Go back to your template (or alphabet letter) and find your pattern in your "Layers and Channels toolbar." The first block should have your clipboard graphic in it. In this case, you can see my Yellow Brick Road pattern. Click on it to select.
Now "Fuzzy Select" the area that you want to fill. In this case, it's my alphabet letter. Right click on it or go to the top of the screen to "Edit". Now click on "Fill with Pattern."
Your template should now be filled with your background graphic. So you need to save this. Go to "File" and "Save As" Find where you want to save your graphic. REMEMBER where you save it. (That's usually one of the hardest things for me.) In this case, I created a file called "Yellow Brick Road Alphabet" in my pictures file.
You can see that my file is trying to save it as "A.jpg" in the "Name" area at the top. To keep the file transparent, you need to save it as a different file extension. My favorite is a "PNG" file. So name your file. In mine, I named it as "Yellow Brick Road A.png" Be sure to add the (dot) png at the end so it knows how to save. Now go ahead and click save or "Enter" and just keep hitting "Enter until it's saved completely and returns you to your file.
Now your done with your template. Depending upon what you want to do now, you have a transparent file that can be added to any other graphic or file to complete your project.
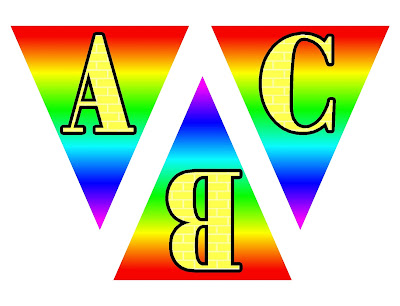
I made a pennant banner with mine by using Printmaster. (I'm a huge fan of it and use this program for most of my designing.) I am excited with how this turned out and can't wait to add it to my Wizard of Oz party table. Plus, maybe now, I'll remember how to do this for next time.


No comments:
Post a Comment